Done The Mega

Well, all done the Mega. Finished it Saturday and shipped it out today. I hope and pray that it\’ll make it through the shipping process without damage. I suppose that\’s one of the advantages of just doing a simple paint job and not doing a sculpted custom. Overall I\’m very pleased with the Mega. It\’s another step up for me in my execution but as always there\’s plenty of room for improvement. Now I just need to wait another month before I can show anyone.
How anti-climactic.

So I guess all I can do now is move on to the next piece. I want to create a few more customs before the MunnyWorld Custom Toy Show. But then I have to move on to the Evil/Naughty Toy show I\’ll be submitting 3 pieces to in December. No time to rest, gotta keep it at full speed.

Hopefully by the end of the week I\’ll have another custom that I can actually show pics of.
That\’ll be nice.

Painting the Mega Munny

So yesterday I painted the Mega. I didn\’t quite finish but I got far enough that I\’m excited. I started the day by testing some color choices on a Dunny. Once I got my colors, I headed over to Michaels and picked up some paint and some paint jars. Then I began mixing color. In the past I\’ve just mixed color on my palette and that ALWAYS gets me into trouble because I\’m bound to run out and have to mix more. And of course matching the previous color is such a hassle. Knowing that the Mega was going to require a bit of paint I pre-mixed about 4 oz of my base color. Having already decided on my color choices it was relaxing to simply paint on the color knowing that is was going to work.

I\’m not the best painter. I\’ve got sooo much to learn and one of those things is to always plan out the color. Being that the Munny is such an important piece to me it was an easy thing to force myself to do, but I need to make this a habit on all my pieces. So when I finished putting on my based coat I pre-mixed my color I had planned to scumble on the base. Once I had my color I began and soon realized what looked good on the dunny for some reason did not read well on the mega. I took a moment to try some new colors on the dunny and decided on a color closer to my base. This time I had it and the Mega started to come alive and my frustration soon turned into glee. I swear, art can make one feel sooo miserable with oneself and moments later so proud. It\’s certainly NOT the reason why I choose to do it.

SO in the end I got the guy finished. Today I\’m going to touch up a few areas that didn\’t quite get done yesterday. I also need to paint his accessories before I am completely done. I still don\’t have the best studio set up yet and when evening came my light source was lacking.

So close to being done. I wish I could post pictures but can\’t until the show. I\’m actually very ready to move on to the next piece. Just not sure what that will be. So many choices.

Mimobot for Infectious Contest


So along with the KidRobot contest, my brother has also told me about a few others. Today was the deadline for a contest held by the Infectious web site. They\’re a community designed site where anyone can submit a design for various products and if they like it enough they\’ll pay you for it and they give you a percentage of the profits each time an item is sold with your design. SO they\’re adding a new product to the catalog, the Mimobot, and they decided to have a contest. Grandprize is $1000 and anothe $400 in merchandise, including your mimobot. So cool. So here\’s my entry. Please do my the favor and check it out and if you like vote on it.

Thanks much!

Click here to vote on my design.

SUCCESS, I think.

OK, so yesterday was a long frustrating day.
After thinking it out for a while I decided to just use the heat gun and manually cook the Munny. It seemed that the only reason I wanted to use the oven was to make sure I thoroughly baked it and the only reason why I didn\’t want to is cause I was afraid of it caving in and not being able to monitor it. I decided if I hand baked him first I could then throw it in the oven and finish it off. In hind sight that would not have worked either. So here\’s what happened.

I spent 5 hours with the heat gun slowly baking the Mega. I have a oven thermometer I purchased specifically to adjust the heat gun to optimum temperature. So after a few minutes I finding 200° F from about 3-4 inches away I began and immediately learned my first lesson. Don\’t stay in one spot for too long. BUT, I also learned how to create an interesting texture. So as I was saying, I learned that if you keep to much heat on one spot, the sculpey will start to bubble. SO, my Mega has what looks to be a rash on his belly. That\’s cool though as it looks very organic looking. So on I went, baking and baking. I decided to use that bubbling technique on the feet, to make them look kinda warty. SO far, SO good. Then I started getting to the chest area and here\’s where the problems started. The warnings I had heard from another artist were true. The head is to heavy for the neck and chest to support it. The first sign I saw of this was the crease between the head and neck on the back side stared opening up. At first it was only about 1/16 of an inch. But over time it separated up to about a 1/4 inch. The vinyl heats up so much through the baking that the head weight makes the chest droop. Even while spot baking. The heat transfers so much through the vinyl that there\’s no avoiding it. If I had baked this in an oven and the entire Mega vinyl was equally soft, it would have been destroyed I think. So, in the future, if I even do a Mega again, I\’ll definitely take the time to reinforce the inside before I start. More on that later.

On I went, and as I continued I found cracks happening. Mostly on the chest due to the flexing of the next. Eventually I finished baking the entire piece. It took as I said about 5 hours. When I was done though I had to address the few cracks that had occurred. And the now permanent gap in the back side of the neck. SO I got the sculpey out and did some touch up, baked him some more. I thought I was done now and made the mistake of moving him around to inspect the piece for more cracks and in turn created more. More touching up and more baking.

After discussing with a friend about my troubles he made a suggestion which I think is pure genius. I had mentioned that someone on the KidRobot forums had claimed there was foam in the head and he said that if there wasn\’t it would be a great way to add support. \”Why don\’t you completely fill the entire inside with spray foam so that when it hardens there\’s no way for the vinyl to flex?\” Me…\”Where were you 2 weeks ago before I started sculpting?\”

So I ran to the store and purchased me some spray foam, drilled a hole in the back of the body and sprayed that Mega full of foam. Now, I don\’t know if this particular foam will greatly help my cause at this point now that the Mega is cooled down and the vinyl is strong again but I feel that had the foam been in the from the start it would have saved me from the flexing and cracking during the baking process. And for those of you who may be worried about the foam getting too hot during baking, they sell heat resistant foam spray as well.

So anyways, now that I was done baking and I patched the hole in the back I took the Mega outside and applied some gray primer. After an hour I polished the primer will an old face cloth and finally I was done for the day.

Soo, it does seem like baking a Mega Munny is possible and now that I\’ve got my first one out of the way I think that if and when I do another it\’ll be a breeze.

Baking the Mega Munny

So I\’ve been working diligently on the Mega Munny for the KidRobot show in Nov. The deadline for the submission is next week which means in order to ship it on time I really need to be done by the end of the week. The mega is pretty much done in-so-far as the sculpting, but now I have to bake this thing and I\’m terrified of ruining all the hard work. I\’m super happy with my results so far and it would really suck if this didn\’t go well. The mega is just too big for my oven. It would require an industrial pizza oven and that\’s not something I expect to own any time soon. I purchased a heat gun and I\’m thinking that I can make my own oven out of a cardboard box and tinfoil. It works well, something I learned in boy scouts soooo very long ago. BUT, I\’ve heard from another artist that when she tried to bake her Mega the head sunk in due to the extra weight. I can believe this as it happened with the totem pole. So I can try baking it in my tinfoil oven and then possibly pull out my creation with the head sitting inside the belly. The other route is to just use the heat gun manually all oven the Munny. But to go this route would take a very long time and it would be difficult to judge whether or not I had thoroughly baked the entire piece.

What to do? Well, I\’ll post the result (no images of course) by the end of the day.

Munny Totem Pole

All in all, I think it looks pretty cool. It\’s based on an authentic totem pole my wife and I got up in Alaska just a couple months ago when we got married. The story behind the totem is great.

It is about a lazy young man who does not help support his uncles tribe. While the others work, he plays and watches eagles all day. The uncle in his infinite wisdom casts the nephew out of the tribe and tells him he needs to learn the customs of the people before he can return. The boy is all alone and becomes very hungry. The wise eagle sees the boy and offers him a salmon. The eagle then says he will not help the boy again until he learns the customs. Many years later the uncle\’s tribe is unable to survive so they move their camp down the river. They then come up to a new camp of a strong man. It is the nephew. He has learned the customs of the people and started his own tribe. He welcomes the uncles tribe to join him and share in his great fortune.

That\’s about how I remember it told anyways.

SO….After I won the Munny World Custom contest it became glaringly obvious that I needed to get to work. In just two short months I\’ll have a chance to show people what I can do but the reality is I have nothing to show. Jenn and I started brain-storming on what concepts would be cool to see. Almost immediately Jenn pointed out the totem pole that we recently received as a wedding gift from her sister and husband. We both agreed that it would be pretty cool to see a Munny totem pole. But had anyone done it yet? We scoured the web and all we managed to find was one guy who had done some really cool totem designs painted on the Munny but no literal totem poles. It seemed like the project was a GO.


This one was a lot of fun but technically frustrating. I\’m not the best at creating straight lines in sculpture, something I\’ll need to improve on for sure. The one saving grace on this concept is that a totem pole is in itself a work of art so there\’s certainly a level of leniency in reproducing it. For starters I screwed a Munny head to the bottom and the top of the whole Munny. Eventually I would end up super-gluing the head of the whole Munny so it wouldn\’t turn and then I used plumbers putty to secure the bottom head to the feet of the whole Munny. I had Originally just used sculpey under the feet but the weight ended up being too much. I purchased some craft wood and cut the wings using a band saw(my wife\’s dept at the university had a nice work shop at her disposal). I then used a dremel to cut the designs out of the wings. Once I had my final sculpture in place I just managed to fit this into my oven and bake it for 15 minutes. I discovered that the exposed vinyl gets very soft. I didn\’t come across this on the first one because the entire piece was covered with sculpey. By the time I took it out of the oven it was sagging over. Fortunately all I had to do was prop it up so that it could cool in the right shape. This was a very good thing to learn before I start on the mega. It\’s clear to me that the mega will need an internal armature to support the weight.

As usual the painting was the most frustrating part of the process. I figured coming into this that the only real challenge with the painting would be to capture the wood color. The rest of the piece would simply be flat color and wouldn\’t be too difficult. Well, that was true but it took forever to get the wood color. In fact, I ended up moving past the wood color and painting in the flat color just to get my confidence back up. Things did get easier once the flat color started going in and I could finally see it looking like something other than a totem pole looking piece of poo. I then went back and filled in a more appropriate color base. Finally I glazed on some wood grain to finish it up.

MunnyWorld Custom Contest

WOW!!

So I told my brother Chris that I quit my job and he was psyched about it. But more cool than that was him sending me all these websites that had contests on them. The first one was the Kidrobot sponsored Munny World Custom Contest. And the deadline was in a week and a half. I\’ve been a fan of Kidrobot for a few years now and even purchased a Munny at the KRMIA Chumps release party where Frank Kozik signed my Munny \”Stop Whinning, Start Designing! Kozik \’08\”. But aside from drawing two really improvised sketches on a pair of Munnys purchased in Miami for my in-laws, I\’d never done a custom Munny. But I had been working on a sculpture in my spare time over the last year and both my brother and I thought that it would be cool to see it transformed into a Munny.

SO I went out and purchased a mini and started sculpting. I was still finishing my two weeks out on my old job so I had to work in the evenings. I think I spent 3 evenings working on it for a total of 12 hour, then I got a full day to work on it which put me up to about 24 hours. Then I had to bake it and then paint. The painting was trying as I was so rusty. I think I put 4 coats of paint on it that I hated. I was trying to go realistic with greys and greens and it just looked stupid. Eventually I figured out that my stylized reds and oranges just looked better. I really got nervous toward the end as the acrylic was started to build up and fill in some of the detail. In the end though I learned a lot and was pretty happy with the paint job. Painting has always been my weakest area and I knew that it could make or break the piece.

When I was finished I felt that at the very least I would get honorable mention. I could look at it and honestly say I was happy with the result but my perfectionist eye was saying, \”jeesh, you\’ve got a long way to go before your stuff is truly professional looking.\” I wrote my letter and submitted the piece. I had looked all around the web at other customs out there and really didn\’t think I\’d win. I mean mine\’s OK but I have seen some unreal customs.

But I won anyways. As a winner(1 of 5) I get a 20\” Mega Munny to Design and then have shown in a gallery Nov 12-15th in Soho New York. I also get 60% if it sells. And all the PR that this show will offer me. So here I am, just days from being officially unemployed, hoping to make it as a fine artist and I already have my big break. I had thought I\’d struggle for a few years before anything like this would happen. How lucky can one guy get? Now I understand that a show in NYC doesn\’t equal success, but it sure helps me.

A New Career Direction

Recently I came to breaking point in my professional life. About a month or so ago Jennifer and I went to the SAM(Seattle Art Museum) and it left with me some strong desires of changing my life. The next morning as I lay in bed I was in tears thinking how I\’ve wasted 10 years of my life not pursuing my true passions. I reflected how I had spent the last ten years running as my favorite pastime. How I had tackled various running goals like completing a marathon, then sub 4 marathon, then ultra and finally 50 mile ultra. All seemed daunting in their own right but I knew that if I simply trained hard for each one the goal was attainable. So why had I not taken that approach with my art? It was then that I decided I would waste not more time and being my slow comeback to the world of fine art. I decided that just like running I would practice my art 3 times a week.

Well, I did it for one week. I went to a figure drawing meet up which was very cool. And a drew for a little bit a couple other times. The following week I wasn\’t as good. However, the next week I did something that was not planned but had been building up for a long time. I quit my job. I realized that I was not going to get much art done when I spent most of my energy doing work I didn\’t like. I had asked Jenn first to be sure and she practically encouraged it. So with the support of my wife, I quit my job during a time of recession.

So, this blog will be a journal of everything I do from here on out in my new fine art career. I\’ll be posting pics of my work and discussing it as I go along. There\’s already plenty to post about which I\’ll get into in my next post.

VINYL ROOTS WITH J★RYU, KEVIN GOSSELIN AND TROY STITH [REVIEW]

Critics critique and collectors collect. I like to do both. Under the right circumstances (when the moon and my bank account are in alignment) the highest compliment I can pay an artist is to pay that artist. This is precisely what I did on Saturday night at Vinyl Roots, a show of one-off and limited edition art objects by J★RYU, Kevin Gosselin and Troy Stith at Dragatomi in Sacramento.

These three artists are part of a new wave of toy customizers who are working to (literally) change the shape of customs as we know them. Rather than use an existing toy platform as a jumping off point, J★RYU, Gosselin and Stith see the vinyl as more of an armature. Kidrobot’s Munny or Toy2R’s Qee may be at the root of the sculpture, but it’s often completely buried and obscured. I anticipate that J★RYU, Gosselin and Stith will eventually abandon the platform entirely or perhaps continue to sell customs and multiples in order to fund the production of original work.

J*RYU
Jet-set J★RYU flew in for the opening. I hadn’t spoken to Jesse since a conversation where I expressed my opinion that talented sculptors ought not to need DIY toys in their works. Jesse continues to customize toys, but the body of work he created for Vinyl Roots was an exciting departure: More roots than vinyl!

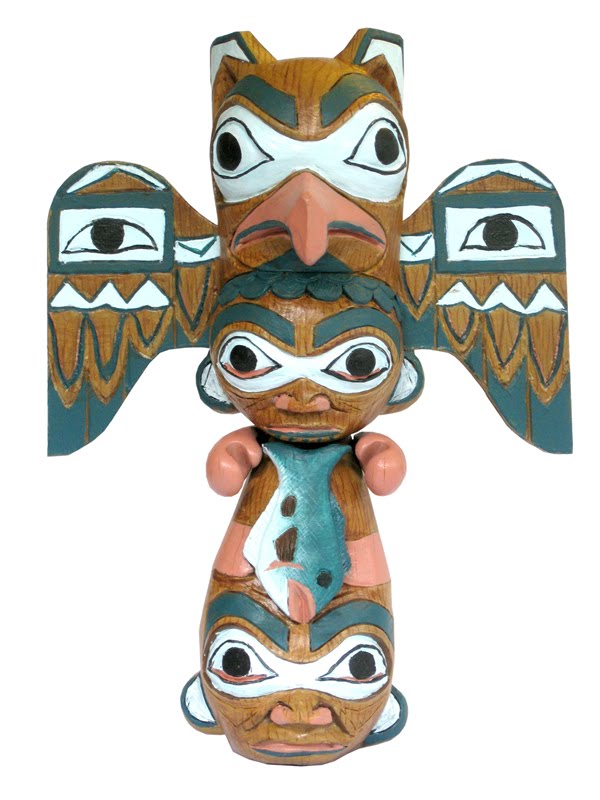
All of J★RYU’s creations for Vinyl Roots fit conceptually and texturally within his existing universe, but he moved from framing them as toy art to design objects. He did this in a couple ways: He made the characters functional. Each one is a vessel. He found ways to integrate them with their surroundings. Some have legs that hang over shelves, for instance. The result is a wonderful interplay of the synthetic with the organic.

The vessels are made of clay and wire. Flowers represent souls. An older character is marked by a larger number of flowers. Younger ones carry just a singular stem. Jesse sculpts from scratch without initial sketching. On the technical side, his faux-tree texture is top notch.

But it’s the faces that stir an emotional connection. We played an interesting game in which Jesse told us the personalities of our favorite pieces after we’d made our selections. Dog-loving Matt Hisey chose Gohan Jones, named after Jesse’s dog. I chose Bertram, who Jesse described as “inquisitive.” Very interesting, huh? (I’m looking forward to putting some Nepenthes in Bertram’s vessel when he comes home after the show!)

Troy Stith
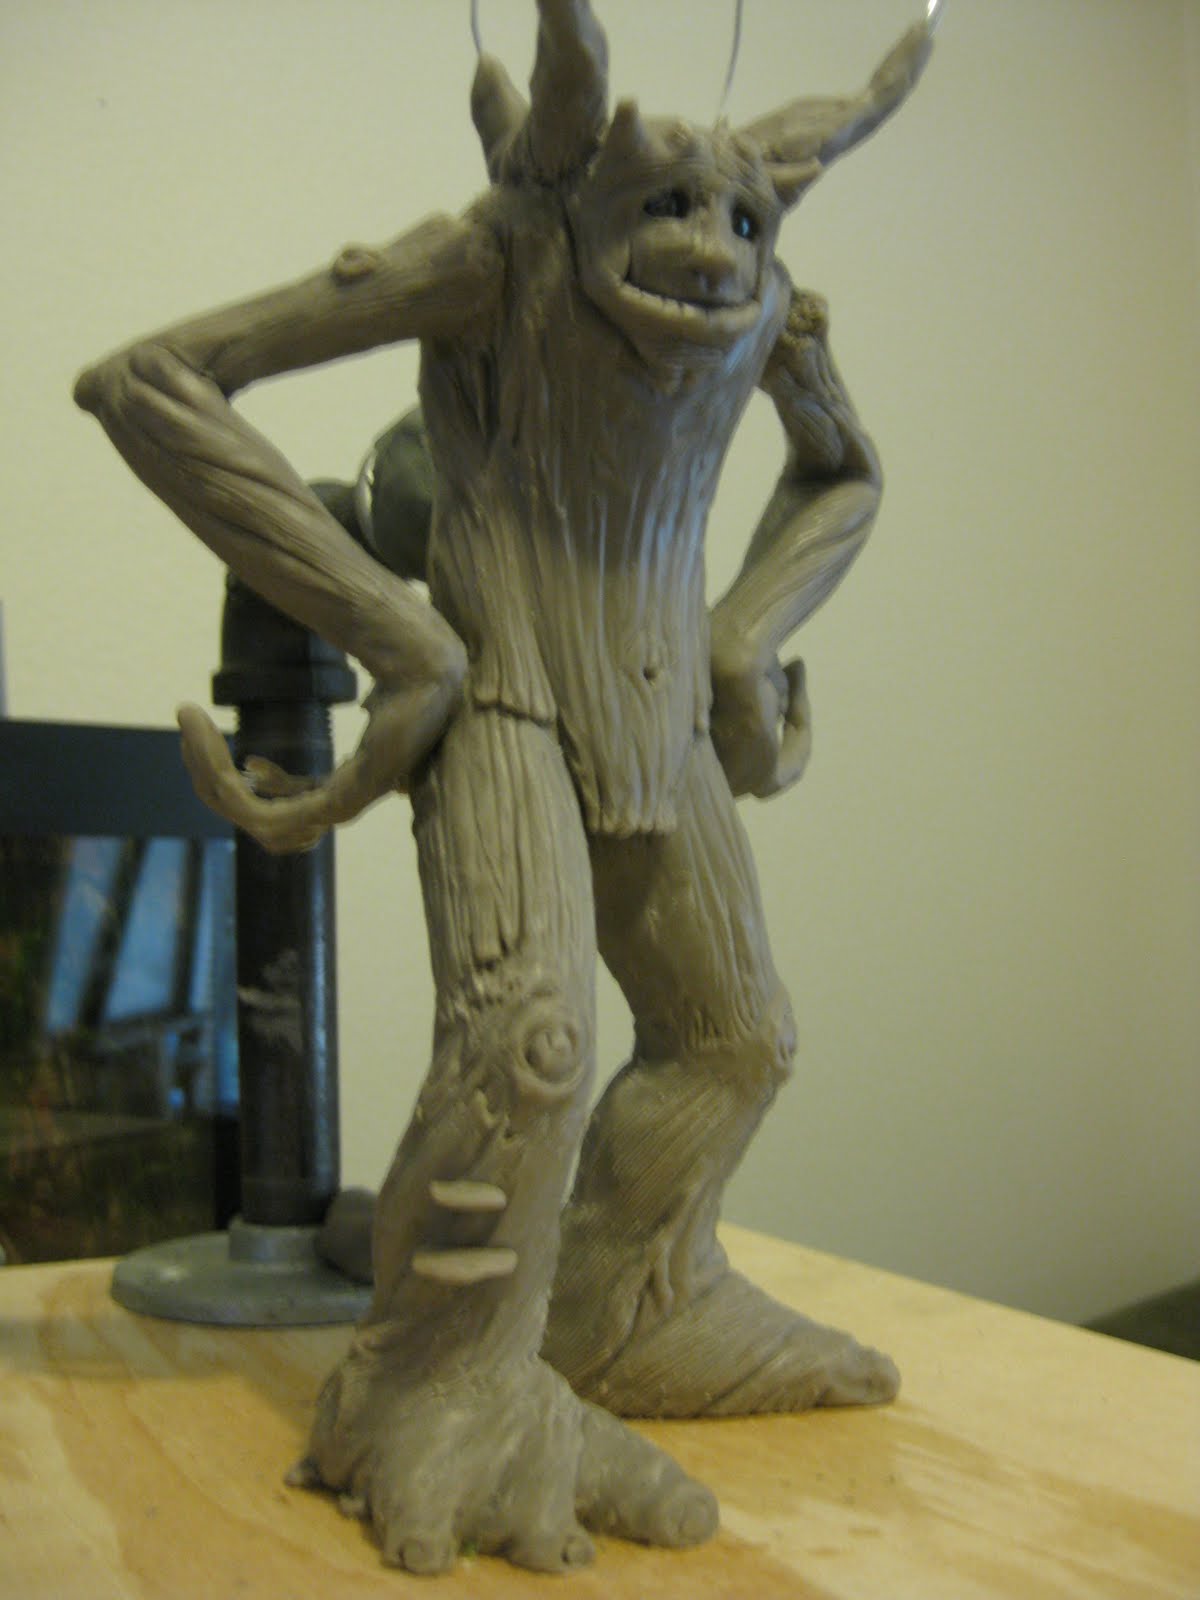
Troy Stith was unable to make the trip to Sacramento, but he submitted eight works that continued in the “bonsai” style we have seen from him. He set his Vinyl Roots pieces in a story, entitled The Wanderer. The tale is a first-person narrative about a journey through the “Caverns of Yandor to the great lands of Maroneen”.

If I were to suggest that The Wanderer reads as kind of Lord of the Rings-y, that could mean different things to different people. For collectors who are fans of the sci-fi/fantasy genre and appreciate organic-looking art with a touch of Asian influence, Stith has you covered.

For me, I see the work as being technically skillful, but lacking that je ne sais quoi responsible for connecting with its audience. Stith knows texture, but I’d like to see him work on character. The “wretched faces” of The Screaming Twins could use a tweak to make them seem caught more mid-”wail” as they’re being cut down. In the story, Stith writes that the trees of The Daven Forest “seem to be watching you walk through their land,” but his tree sculptures lack eyes.

To be fair, Troy was at a bit of a disadvantage because he wasn’t present for the show. It’s a fact: an artist’s palpable charisma can elevate one’s perception of a good sculpture to a great sculpture.

Kevin Gosselin
Kevin Gosselin drove down from the Pacific Northwest for the opening of Vinyl Roots. In a relatively short time, Gosselin has risen to the ranks of the most talked about toy customizers. His skill level is undeniable. I was glad to have a chance to see some of his work in person.

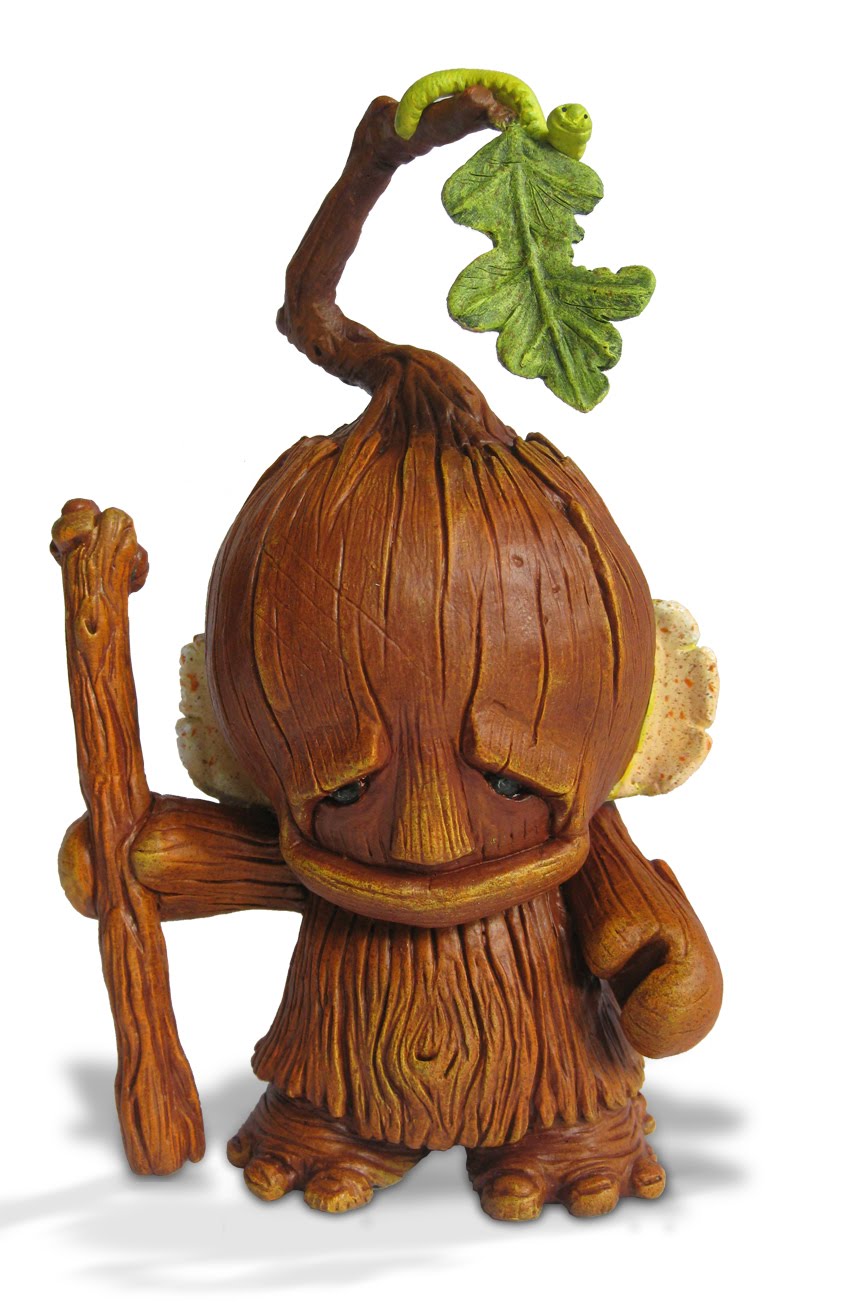
There’s definitely something rad about mastering texture, and Kevin can claim this victory. Gosselin’s Golem look like stone. His Tree Ent appear as wood. For these pieces, Kevin used the Munny platform as it was intended. He customized a blank DIY toy, but then took it to the next level by hand-casting limited edition resin multiples. For the custom Munny collectors out there, the Golem and Tree Ent are must haves. Often with customs, cameras and lighting can hide mistakes and imperfections. In this case, digital photos do an injustice. If you purchase one, I think you will be pretty stoked when you actually see it.

I called Gosselin an “open source” customizer because he is happy to share his techniques. What looks like a real stone in the woodland critter above is resin that’s been hit with a “chip brush”. I was present as Kevin gave a brief tutorial about this effect to a fan. He later explained that there’s no reason to be cagey about technique, since craft is only part of the artistic equation. To really achieve success, the sculpture must resonate with its viewers.

Gosselin showed a few original (non-platform) works that he’d created recently for another show. Like Stith’s pieces, they had a certain sci-fi/fantasy quality. The little vignettes and carefully sculpted faces made me feel like I was catching a special instant, a “precious moment” if you will. It was interesting to hear Gosselin talk about these works in the populist context of “kitsch”. He mentioned that he’d be happy to have his sculptures produced and sold at a place like Hallmark. These are not the custom toys of 5 years ago.

Vinyl Roots, featuring the work of J★RYU, Kevin Gosselin and Troy Stith, is on view at Dragatomi in Sacramento, CA through June 4th. The show was worth the trip up there from the Bay Area, so check it out if you can. All available work can be purchased online here. I will post a full set of photos from the show on Flickr tomorrow.